Menu.tex
Menu
Menu is one of the most important parts of a website.
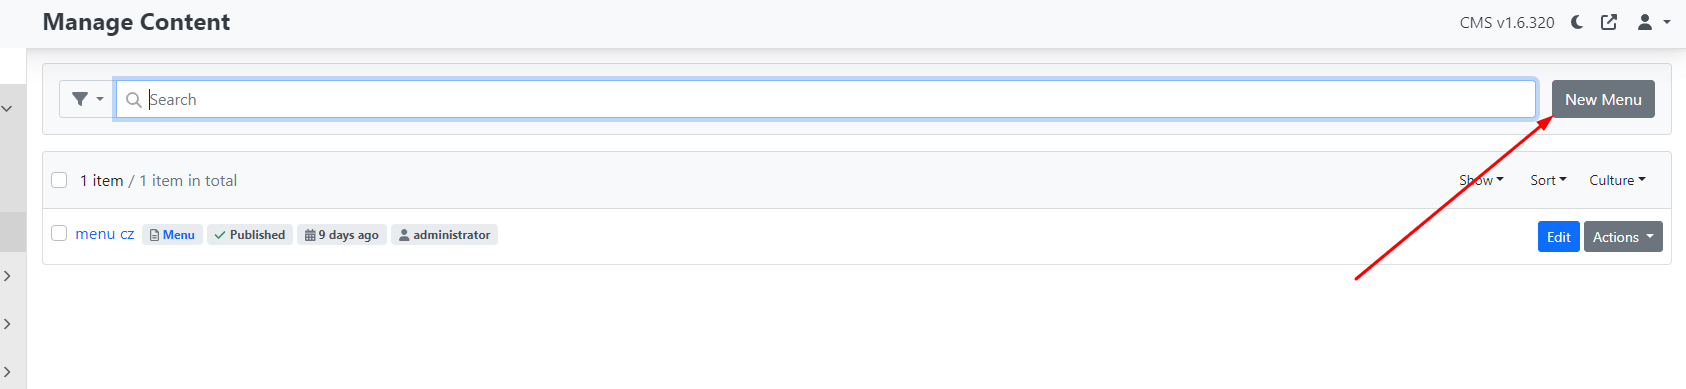
You create a menu under Content -- Menus.

To create a menu use the "new Menu" button.
After clicking on the menu, the following options are displayed:
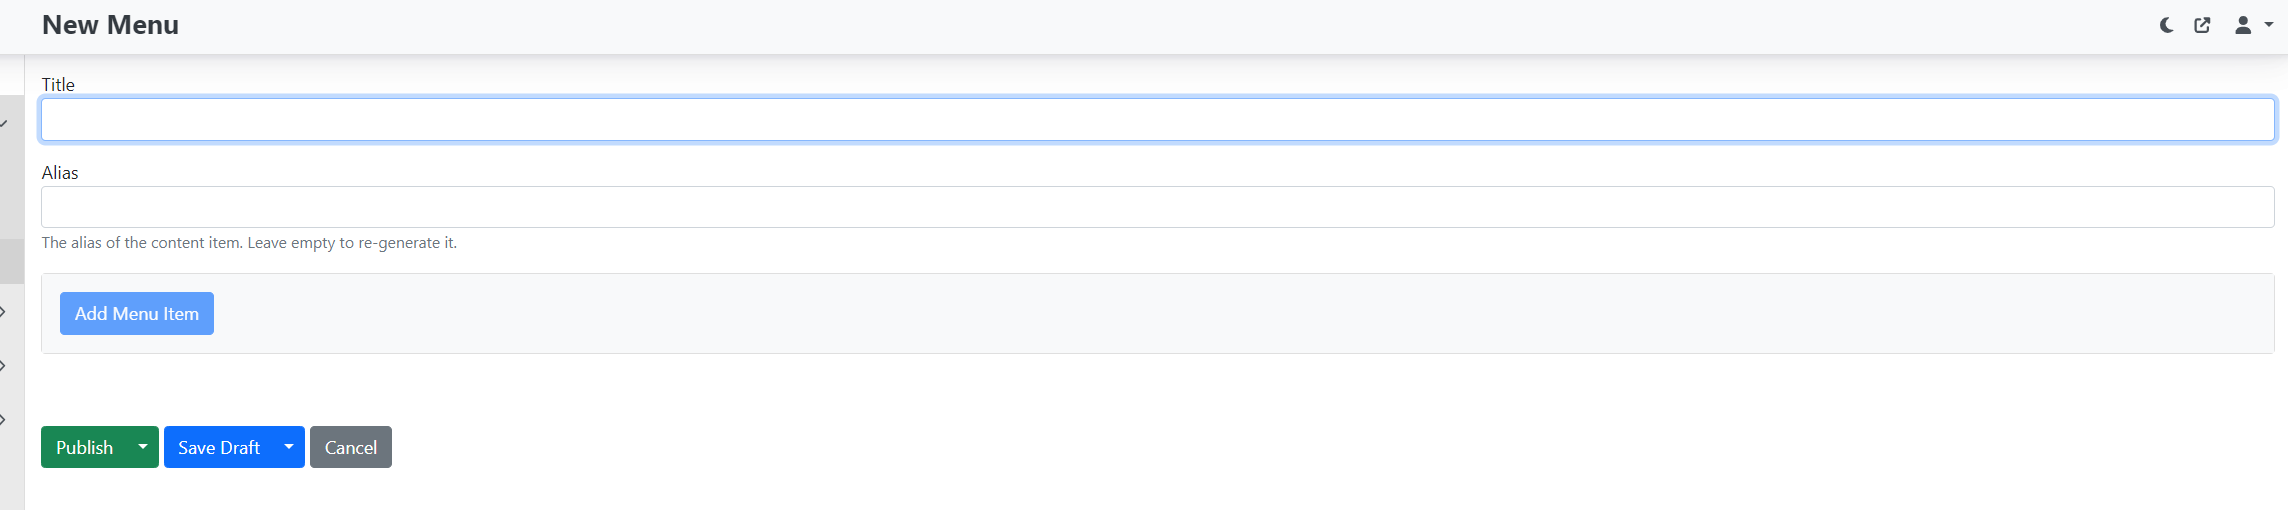
Fill in the "title" – the name of the menu.
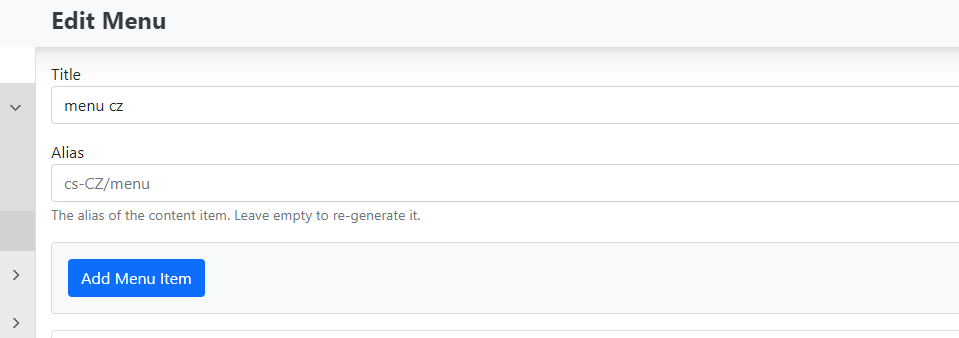
Note: If the website has multiple language variants, we recommend combining the menu name with the locale, for example "menu cz" for the Czech version and "menu en" for the English version.
Alias – not required, it is automatically created after saving (for the default cs culture, cs-CZ/menu will be created).
Save the menu using the Publish button. If you do not want to publish it yet, choose Save draft.
Adding pages to the menu
Only pages that already exist in content items can be added to the menu. They therefore need to be created first.
You add items to the menu using the Add Menu Item button.
After clicking, you will see the following options.
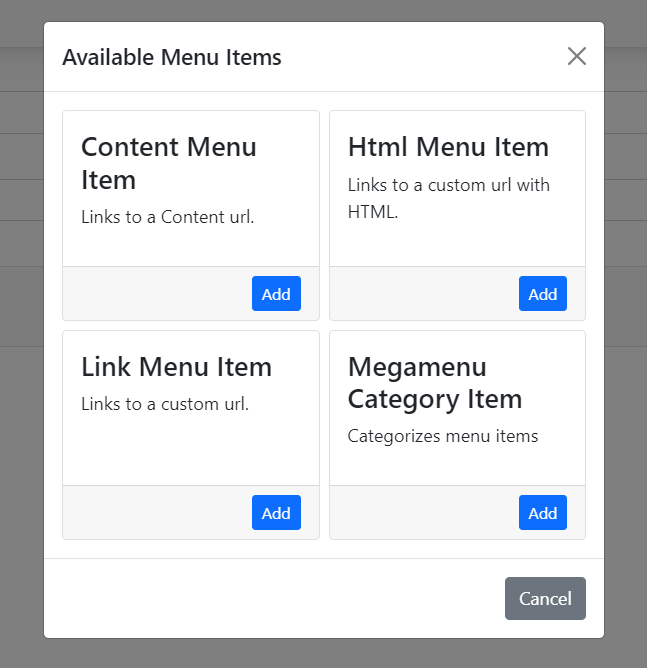
Types of menu items:
There are 4 types of menu items:
-
Link Menu Item
-
Content Menu Item
-
Html Menu Item
-
Megamenu Category Item
To expand the options with a new item, press the "Add" button.
Link Menu Item
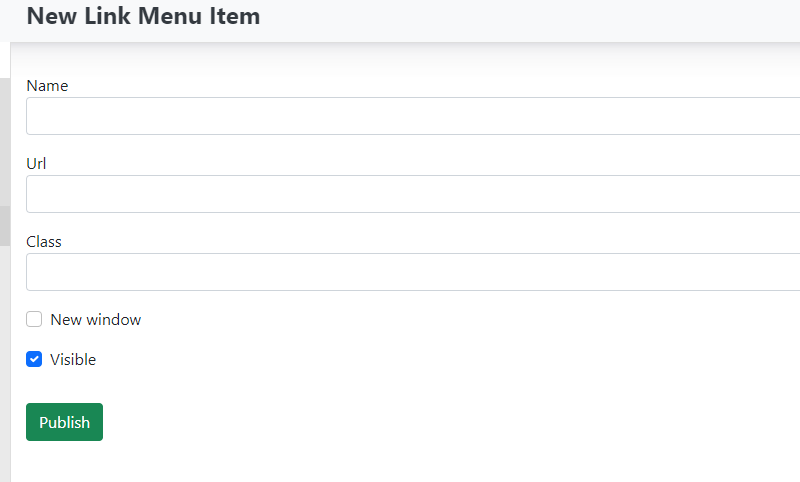
This function allows you to insert a link to any external URL address.
-
Name – Enter the name for your menu item.
-
Url – Enter the web address where the link should point.
-
Class – Filling in this field is not necessary. It is used to add a CSS class for specific styling.
Checkboxes
-
New window – if checked, the link opens in a new browser window. If unchecked, the link opens in the same window.
-
Visible – determines whether the menu item should be hidden or visible in the menu.
Save changes using the publish button.
Content Menu Item
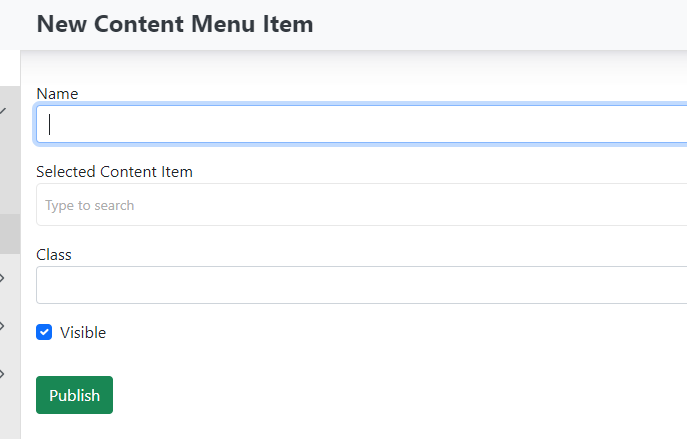
Add a page to the menu that is created directly in the content of the website you are managing. You are inserting a link to an existing page from content items.\
-
Name – the name of the item in the menu (displayed on the website).
-
Selected Content Item – use the drop-down to select the page the menu will link to.

-
Class – not required (you can optionally add a CSS class).
-
Checkbox: Visible – determines whether the menu item should be hidden or visible in the menu.
Save changes using the publish button.
Html Menu Item – not currently developed.
Megamenu Category Item – the megamenu function is not currently developed.
Ordering menu items:
After creating all the required menu items, all links will be listed below one another in the order in which they were created.
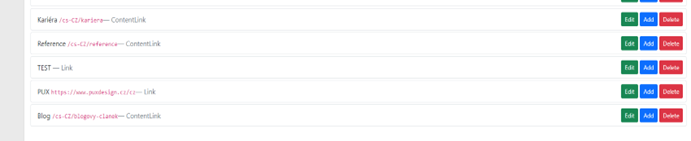
Using drag and drop you can move individual items and change their order.
You can also use this to place items into a "submenu".
If you want to place the PUX and BLOG pages (shown in the previous image) under the menu item TEST, simply drag them with the mouse and place them under that item. This will automatically create a submenu.

On the website the menu will look like this:

Important information
If you want to create a menu item that will not be clickable and will only serve as a heading for a submenu, create a new item of type "Link menu item". During its creation, do not enter any URL address and publish the item as is.
All changes to the menu are saved using the publish button. If you are just preparing the menu and do not want to publish it, save it as a draft (save draft).
Menu actions
You create a menu under Content -- Menus.

For a created menu you can also manage what can be done with it.
The actions button opens the following options:
-
Unpublish – unpublishes the menu.
-
Delete – deletes the menu.
-
Clone – creates a copy of the menu.
-
Audit trail – change history (for developers).
-
Clone in Culture – creates a copy in the current culture.
Localized menu
If your website has multiple language variants, you can create a so-called localized menu for each language variant separately.
-
Create a new menu.
-
Enter for example "Menu en" as the title.
-
Enter for example: en-US/menu as the alias.
-
Add the required menu items (in the given culture).
-
Save the menu.